
I recently had the opportunity to test Krikzz’ RGB Blaster: An extremely impressive, zero-lag device device that plugs into a Famicom’s cartridge slot and outputs RGB video via a Genesis 2 cable. I plan on doing a deep-dive review soon, however people who received units from the first batch MUST perform the fix described here, otherwise you could damage your scaler, HD Retrovision cables or other SCART equipment! Both the original and updated fixes are below the links, including a potential brightness tweak; Both sync fixes work perfectly, but the updated might be a bit easier:
RGB Blaster: https://retrorgb.link/rgbblaster
Genesis 2 RGB Cables: https://www.retrorgb.com/genesisrgbcables.html
The sync fix is twofold: Lower the voltage on the cvbs pin and enable sync on csync. Without performing these mods, the recommended sync-on-csync cables won’t work at all and any cables that sync on composite video (like the HD Retrovisions) might short out. These are SMD components, so it’s not an easy mod for beginners. Anyone with some patience and decent tools should be able to handle it though. Also, click on all pics in this post for full-sized views…and please excuse any other mods, or my sloppy work – We spent days testing and I was aiming for results, not artwork :p
Sync Fixes (Mandatory!):
First, replace the resistor marked “47r” with around a 400 ohm resistor (I used 430), to lower the voltage on the cvbs pin; Krikzz used 220ohm for his, but I prefer to be a bit more cautious and went with a higher value (scope measurements below).
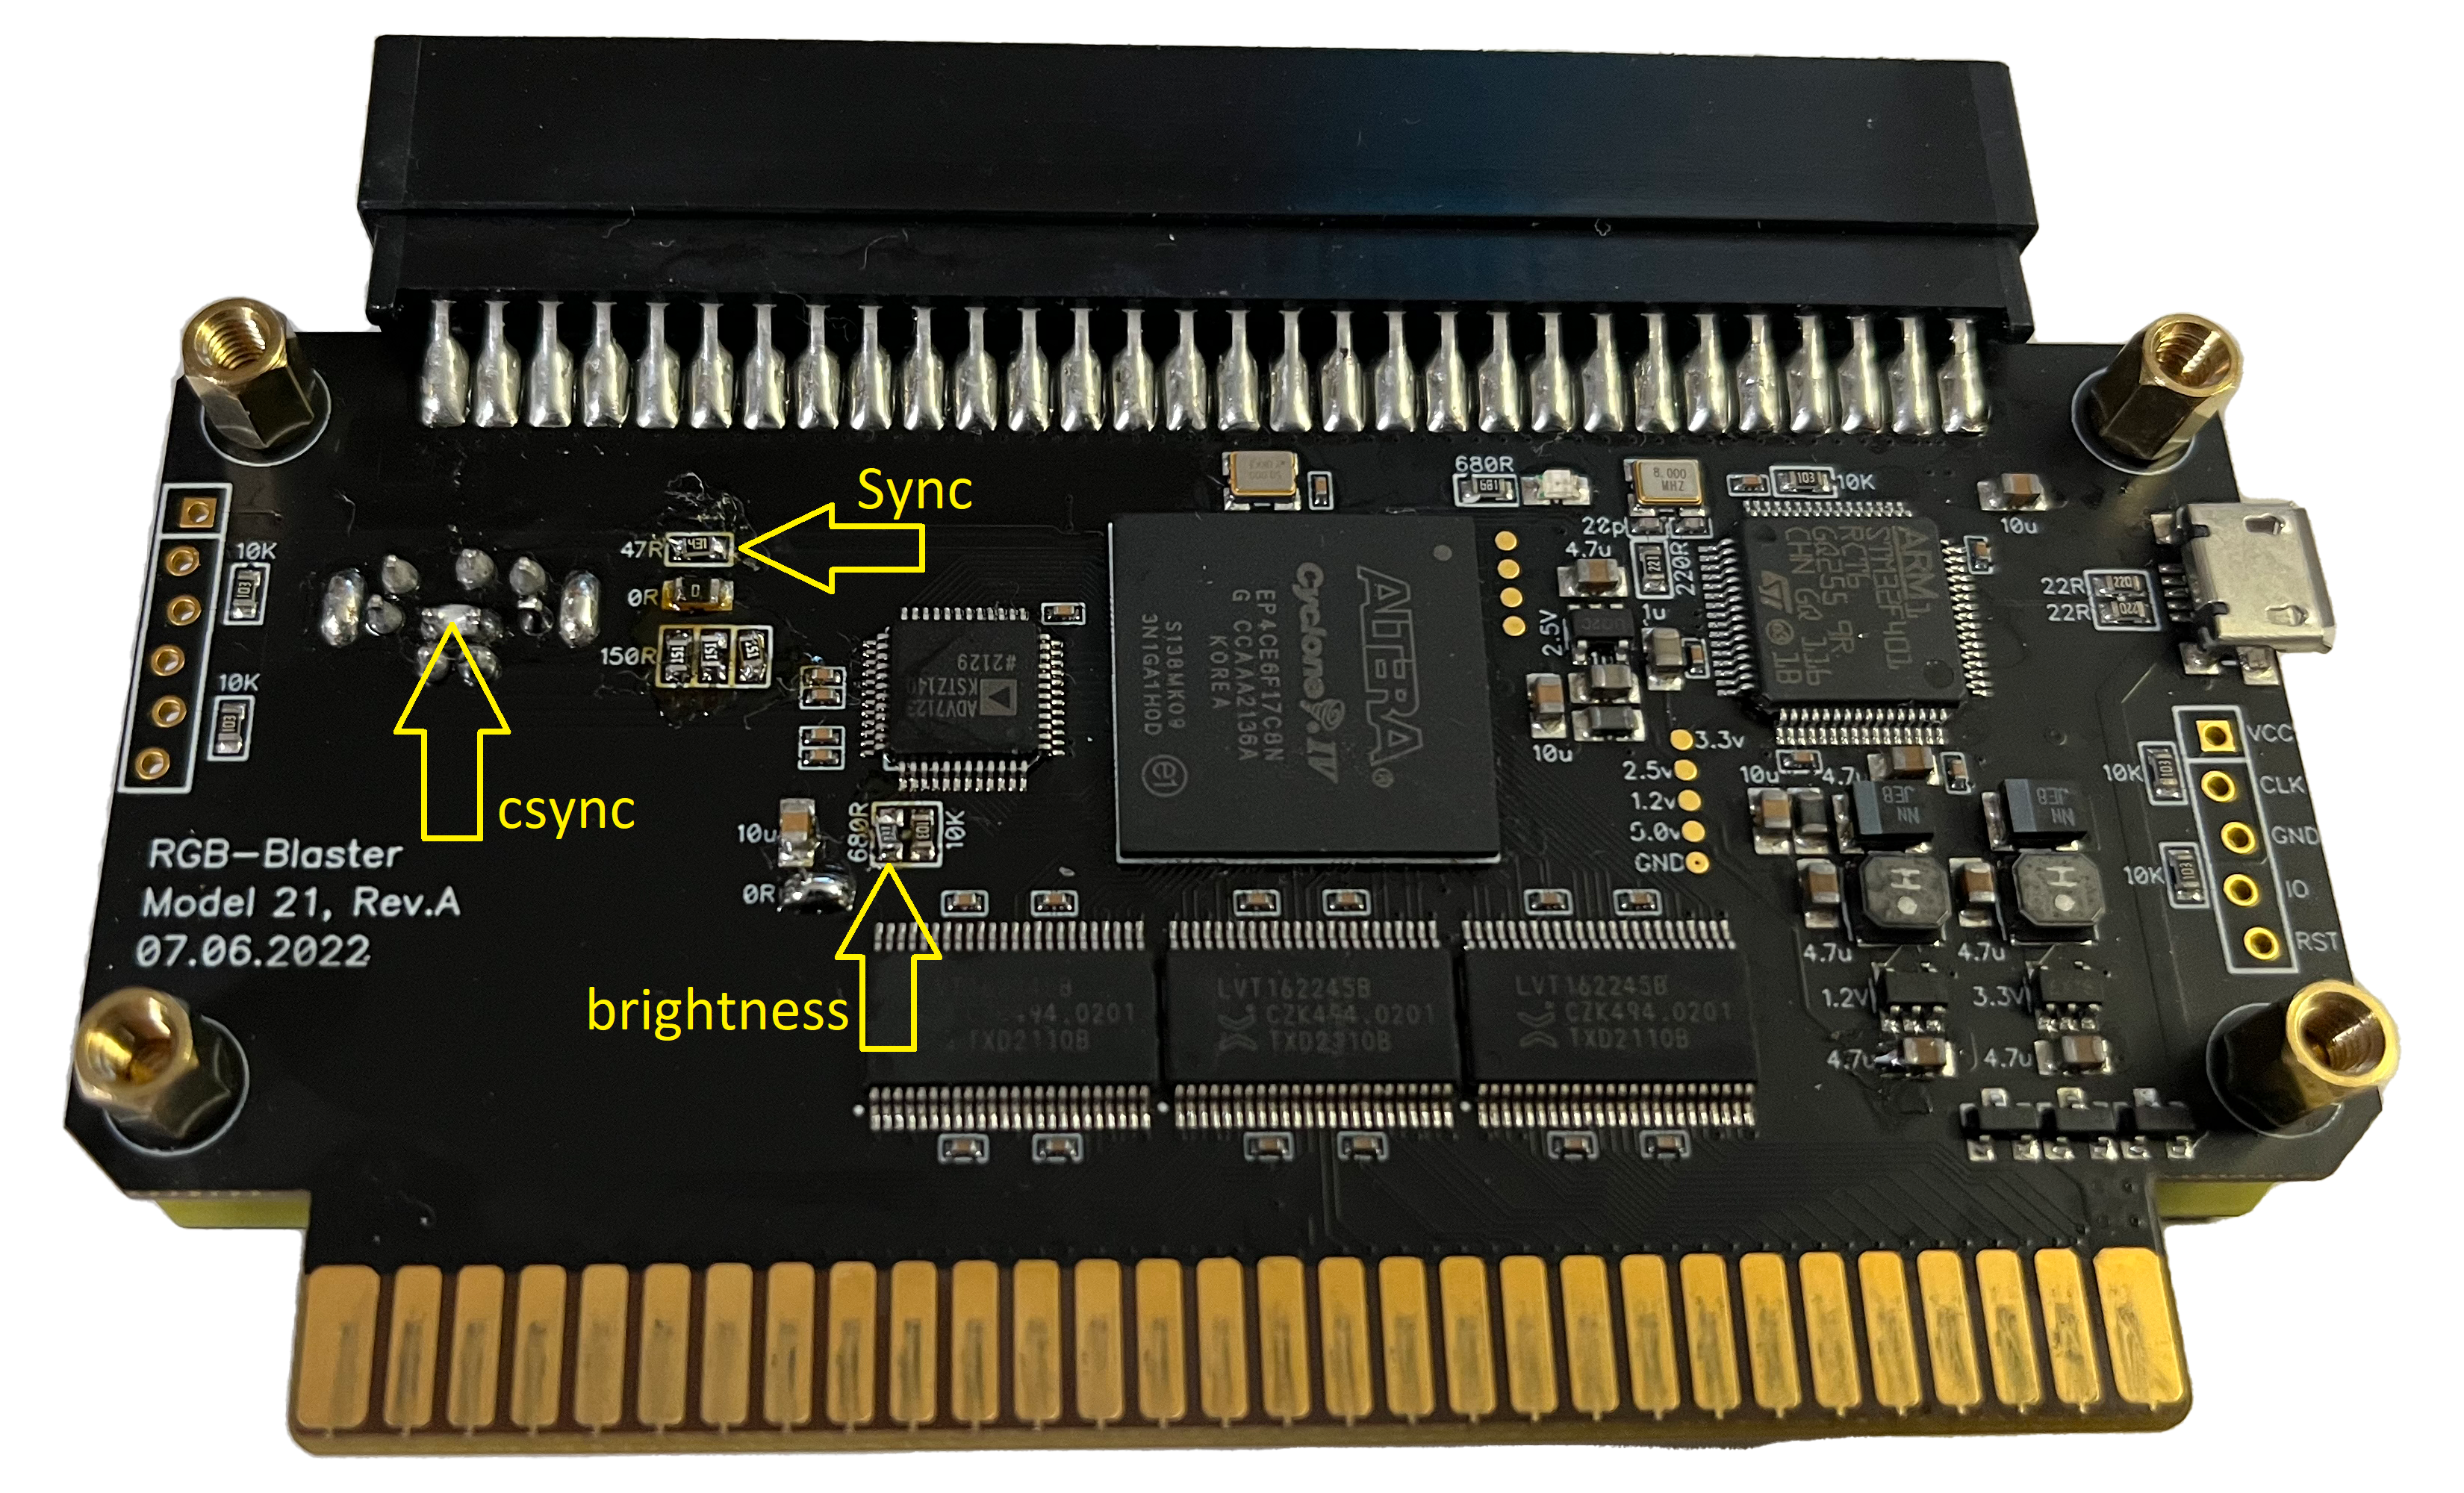
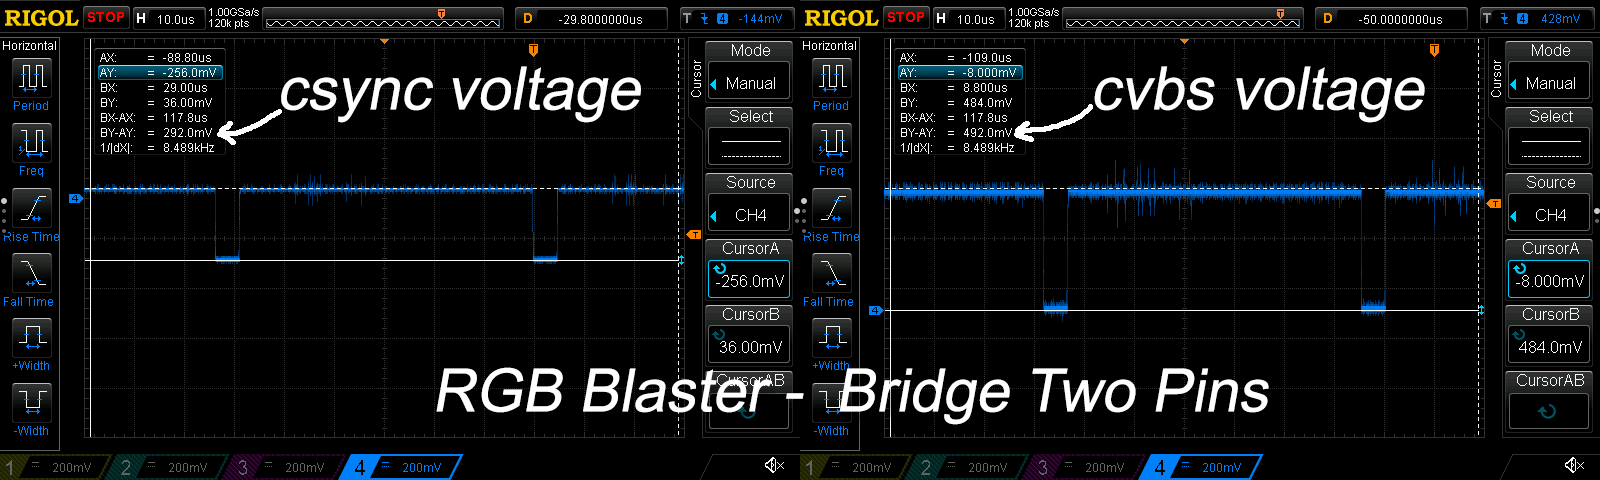
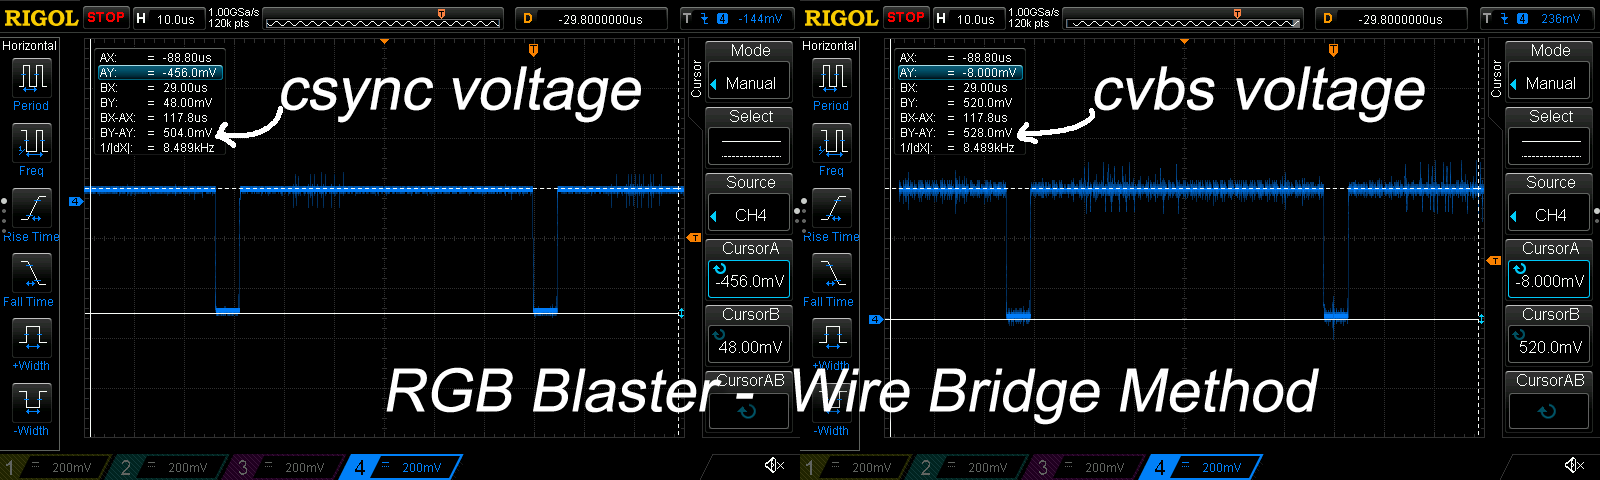
Next, jump the csync and cvbs pins together – This is an easy method of enabling csync. Click on the above pic for a full-sized view, to note the exact pins to connect. Also, the picture below will show the voltage from both pins was excellent with the 430ohm resistor I used:
If you have any compatibility issues, try the brightness fix to see if that makes a difference. Compatibility issues are unlikely and there is NOT a safety issue with this method: Worse case, the voltage drops too low, your device won’t sync and you’ll just need another mod. The brightness fix also slightly raises the sync voltage, so try that next:
Brightness:
If your Famicom’s video output seems dim (or the ‘bridge two pins’ method had sync issues), try swapping the third resistor marked above with something around 400ohm. As a note, just turning up the brightness on your TV is almost the same thing; The brightness fix is for convenience, NOT a safety issue!!!
It’s actually best if you have an oscilloscope and the 240p Test Suite’s all-white screen to measure the output voltage – If so, use values between 330 and 470 ohm to dial in the “just under 700mV sweet spot” for your console. I was able to find the perfect match for my setup and dial in an excellent 700mV on each color. PLEASE NOTE: There’s a wide swing in tolerances between Famicom versions, so if you’re using the RGB blaster on multiple consoles, aim for a lower voltage. I think around 400mV should be fine for everyone.
If you do the swap with a scope, please post in the livestream comments and let us know what the resistor and resulting RGB voltage was (heck, throw in sync voltage too, just for kicks!).
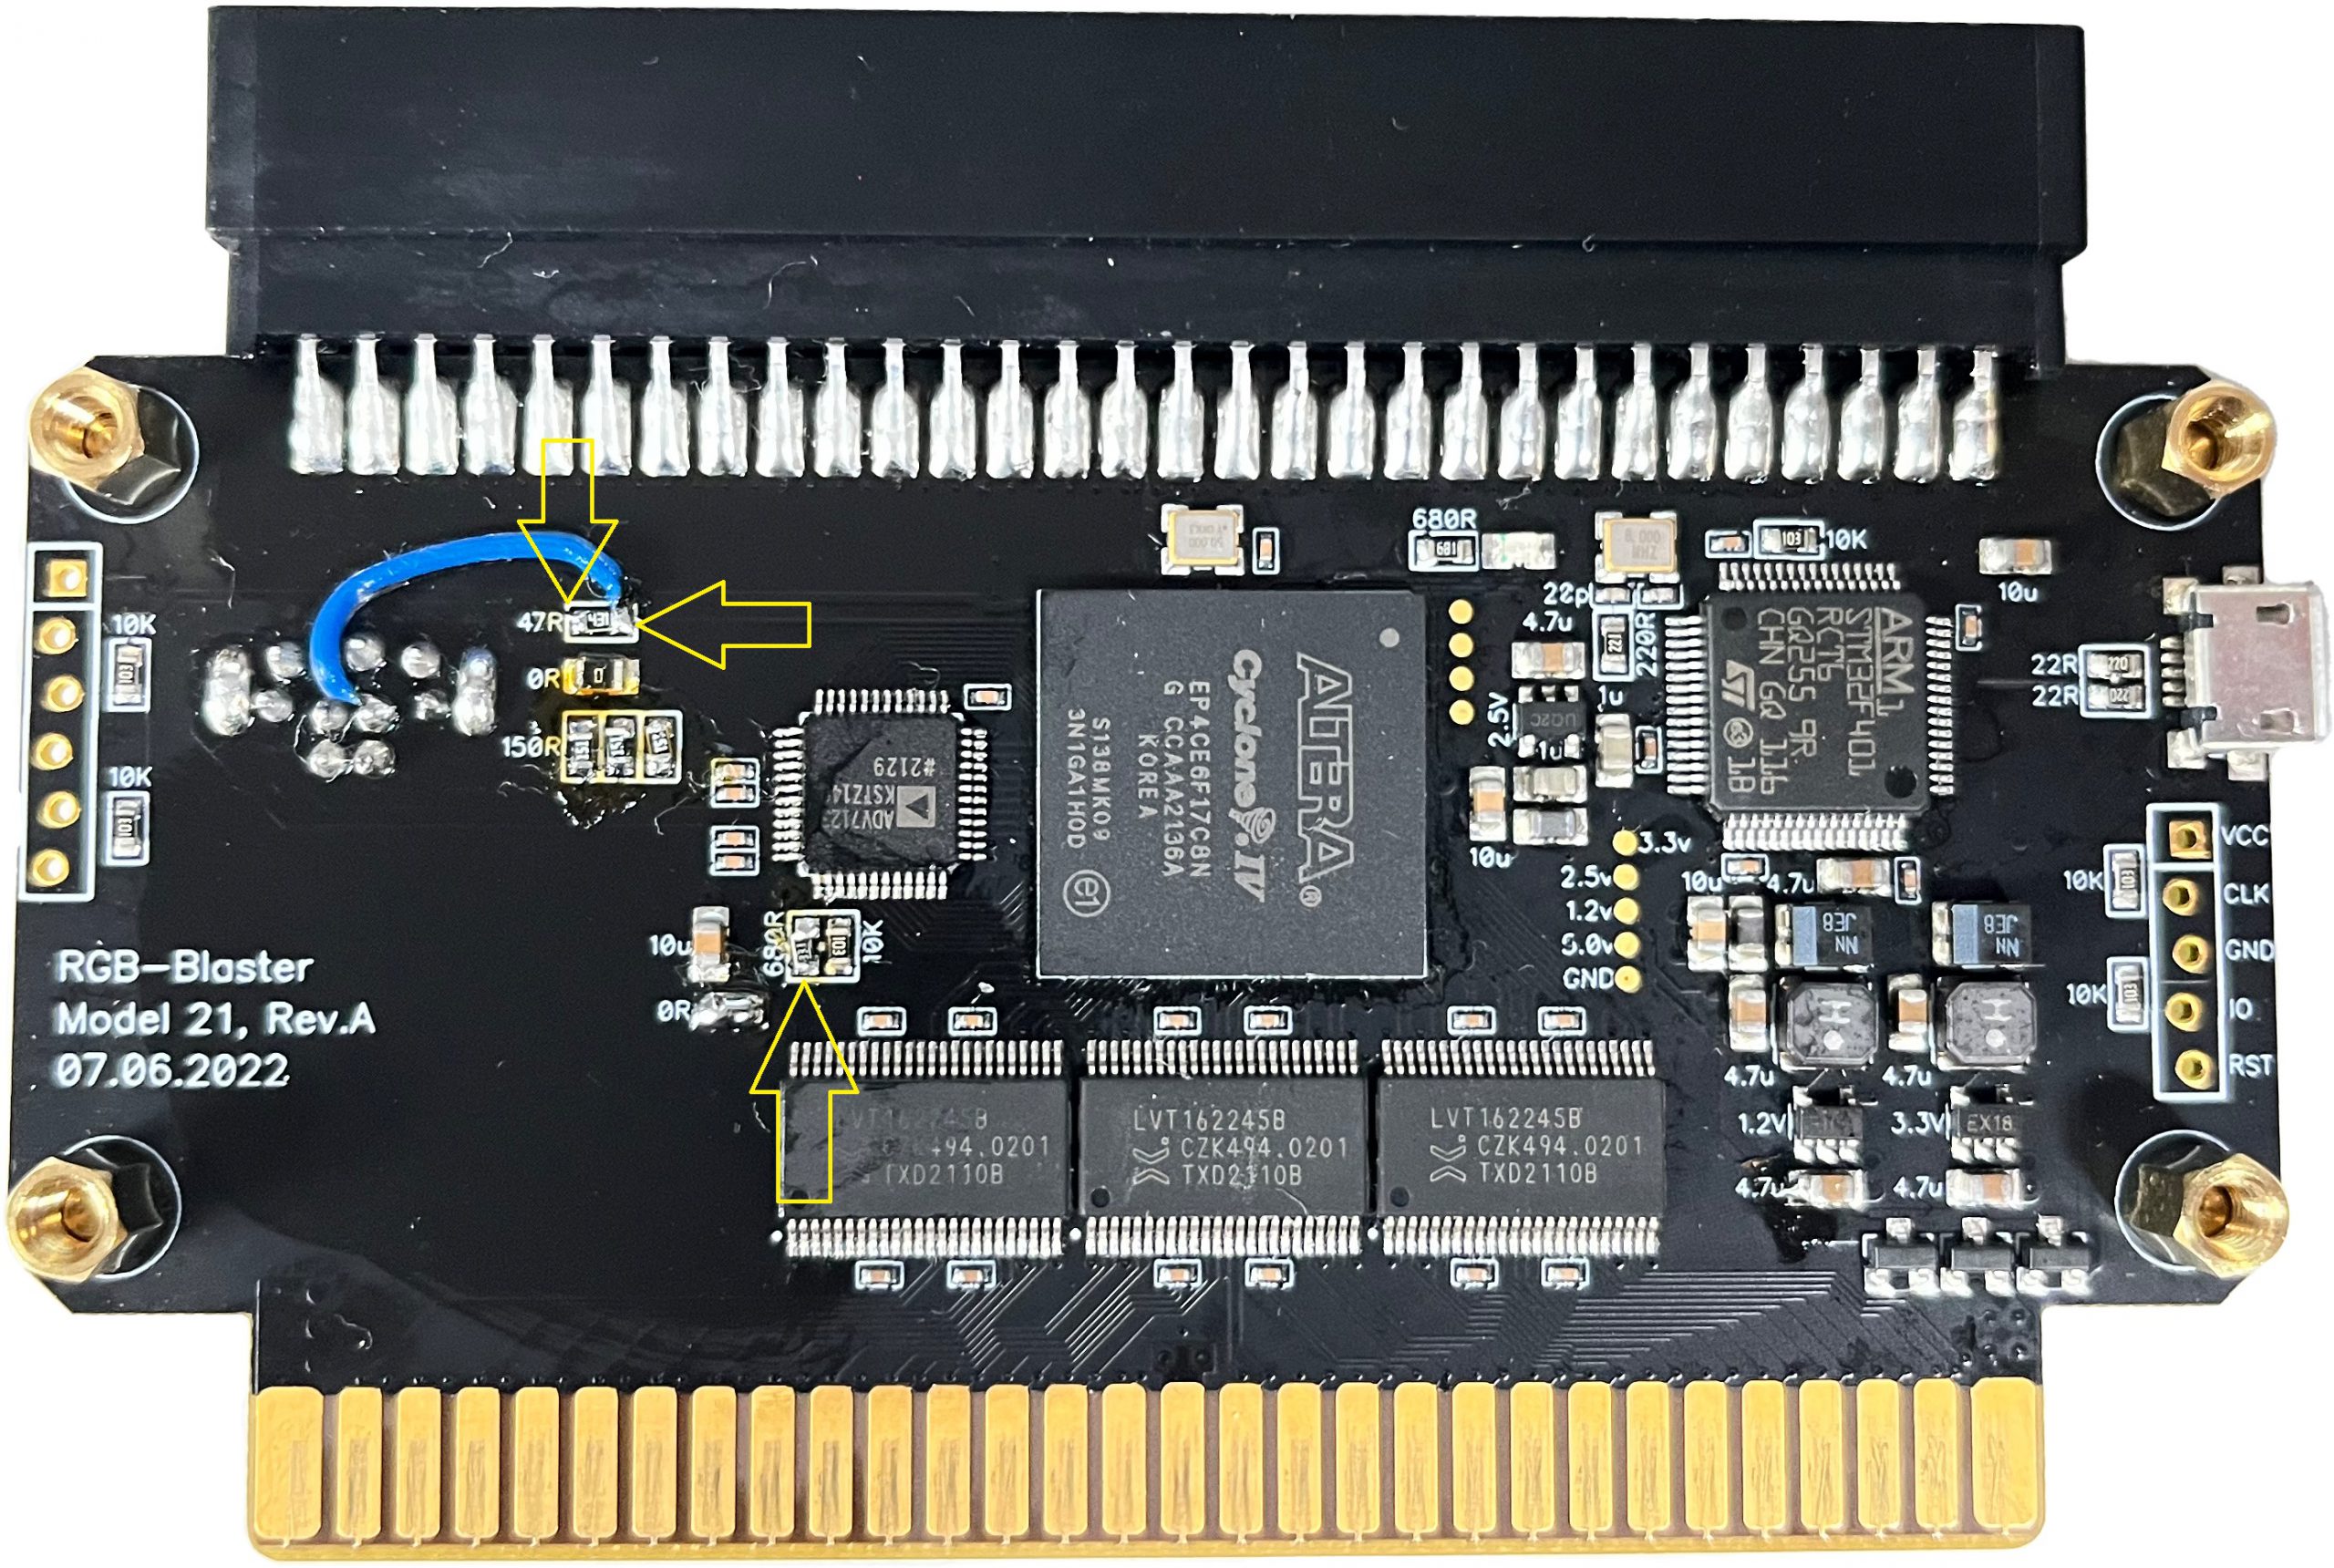
Original Mod:
The original sync fix published here used a wire to re-enable sync to the csync pin. This allows a more controlled voltage for each pin and has the potential for more compatibility with oddball scalers or monitors. If you already performed this fix and it’s working, LEAVE IT ALONE – There’s zero reason to swap to the updated method. If you haven’t done either, try the above method first, simply because it’s easier. And once again, the brightness mod is optional, but might be something you’re interested in.
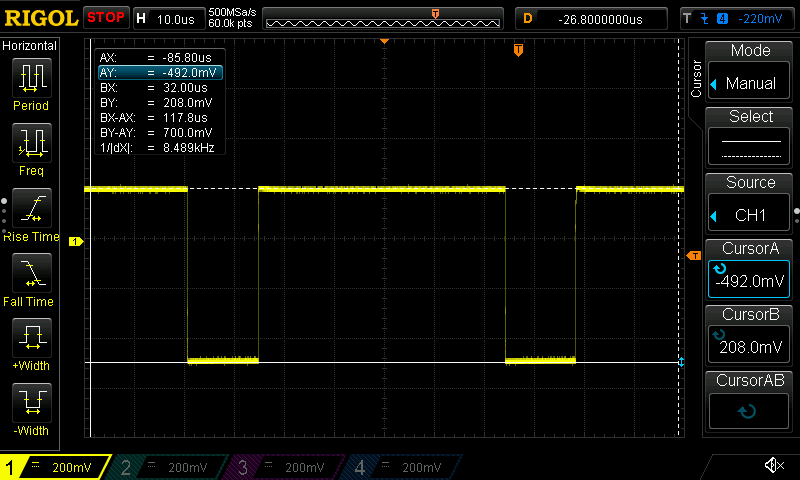
If you were curious about the differences in voltage, here’s the sync results with the “wire method” and the brightness fix applied:
No Mod Needed For Future Rev’s:
Krikzz also confirmed the next batch of RGB Blasters will have both the brightness and sync fixes applied for the next batch. This initial run was pretty small, so not many people are affected.
Instead of make hot fixes for current board revision, i decide hold on next batch of RGB Blasters untill next board revision will be manufactured. In nexr revision will be increased brightness, reduced sync voltage, included csync for beter compatibility with cables. pic.twitter.com/okH9Zg6PyQ
— krikzz (@krikzz) December 19, 2022
If you’d like to see the testing in real-time, the full stream is below, but PLEASE BE WARNED: It’s 3:30min long, with no more conclusions than I’ve written above! That said, Krikzz himself joined and helped Tianfeng and I perform the tests, so it was a blast to be a part of!
