RGB Cart

(click on each picture for full-sized versions, or to zoom in)
The About Me section of this website perfectly explains how and why I wanted to build this, so I’ll get right to the point! Just as I was finishing the Retro Cart, I realized it was all wrong! It needed to be bigger to fit more systems. Also, it needed to be expandable so I can use it with my current monitor, but wouldn’t need to change carts if I ever got a larger one. More important than anything else: Every single game system on it needs to output high-quality RGB video.
I went back to the drawing board and started researching ways to build it the way I wanted. I’d much rather build an entertainment center filled with classic consoles instead of have something on wheels, but I doubt I’ll ever have room in my apartment for that, so a rolling cart is the best possible option. Based on the dimensions I required, my options were pretty much the same as with the Retro Cart: I could spend $500 or more on the perfect rolling cart, or spend $150 on something “good enough”. As you’d expect, I took the cheaper option, a cart from Cambro. When it arrived, it was perfect, except for one thing: It was way too tall.
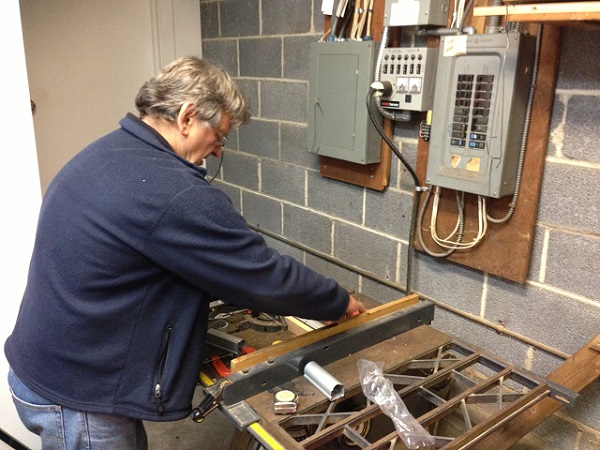
If only there was a person who could help? Someone with the tools and skills to manipulate aluminium poles? Some who’s done this before?
You guys see where I’m going with this?
So, I went back to Axel’s house and he was able to get the poles the exact height I needed:
Since I had the experience of the other carts, I knew precisely how much room I’d need on each shelf. I originally planned on having enough space on the cart for consoles and storage, but my collection grew so quickly that I realized storage was completely out of the question. Allow me to quickly walk you through everything:

The front of the middle shelf holds an Atari Jaguar, an RGB-modded SNES Mini and a Genesis + Sega CD combo. I also have a 32x for the rare occasion I want to play those games (and yes, the 32x fits on that shelf with about 2mm clearance!!!). I much prefer the look of the original Super Nintendo, but the quality output of the mini was so much better than all the other versions that there was really no choice.
The back of the middle shelf has a Sega Master System (with 3D Adapter), a GameCube with GameBoy Player Adapter (outputting RGB of course) and an RGB-modded N64 (more pics on that in a second).

The front of the bottom shelf holds three systems: The Sega Saturn (Model 1 w/4MB cart), my NES that’s RGB-modded & stereo audio modded and a small-form-factor computer I designed a few years ago. The computer supports 240p and 480i RGB output and runs XBMC as it’s interface. It acts as both a media center (for watching movies and videos on the cart), as well as an arcade machine. I have a ton of old-school arcade games loaded on there, as well as a few PC games like AM2R…an amazing Metroid 2 remake that looks awesome in 240p!
Someday I may get a PS2 slim to play PS1 & 2 games and if that happens, I’ll just put it right on top of the NES. There’s enough room for the PS2 slim to fit nicely and I won’t be using it much anyway, as I’m not a fan of too many PlayStation games. I already bought a PlayStation RGB cable, just in case I pick one up!

The left side shows a better angle of the top-rear systems, but it also shows an unfortunate side-effect of having so many systems on the cart: Wires!!! I tried so hard to make the cart as neat and tidy as possible, but with nine systems it’s impossible to get any better than this.

The right side (finally) shows the RGB-modded N64. I don’t mind that it’s the only system that’s “hidden”, since it’s the one I play the least. Yes, that’s right, I even play my crappy Jaguar more than the N64…although the Jaguar is mostly played to demonstrate to friends how much it sucked. Also, the N64 was the perfect system to have on the side, since the controller ports are high enough that it won’t interfere with the lip on the side of the cart.
This angle also shows my Shinybow SCART switch on the bottom right. I really wish they made one that supports more than 6 inputs, as I already have 9 systems on the cart!

The back of the cart is just plain ugly. I tried so hard to make the front look great and as a result the sides and back suffered…but mostly the back. Although ugly, it’s extremely functional. Since the SNES, N64 and GC all use the same type of cable, I switch one cable between them to make it easier to use the Shinybow switch. The way I have the back set up makes this very easy to do. Also, at the moment, I have the SFF computer plugged directly into the back of the RGB monitor. That means all 6 ports on the switch and both on the monitor are filled, so I’m completely at capacity!

Finally, on top is the RGB monitor, Bose speakers and boxes containing the controllers for each system. I specifically chose a cart with extra space on the top, to allow for growth. This way, if I ever find a bigger monitor, I can affix the speakers to the side of the cart on that little lip (double sided tape rocks), move the controller boxes elsewhere and just plop the new monitor in this one’s place: No re-wiring, just a quick replacement!
Well, that’s it for the “cart tour”. I have to say, I’ve been using this thing for awhile now and it never gets any less cool. Seriously, every single time I play a game on it, I am absolutely blown away by how amazing the games look in RGB. This cart (as well as the website and all my other retro video game projects) took a lot of money and a ton of time, but they were all worth it.
Someday, I hope to replace the cart with a nice entertainment setup in a “man room”. That being said, I’ll have every other component that’s on the cart for the rest of my life. Even if they eventually become something I only use once a year, it’s still once a year forever! Who knows, maybe all of this (and my website) will end up in a videogame museum someday far in the future. No matter what it’s fate, I guarantee every year or two, I’ll be using it to play Super Metroid and Zelda: A Link To The Past…and every time I do, I’ll remember how shitty those games looked as a kid (with an RF adapter) and how lucky I am to be playing them on this amazing setup now!

Thanks for reading. Please feel free to go back to the main page, or to check out the other carts I’ve built.